
Hydraulic bike brakes can be considered to be the premium tier when it comes to bike braking systems. The innovation and technology that goes behind these brakes are nothing short of revolutionary.
But that also means that maintaining these radical brakes is no simple feat.
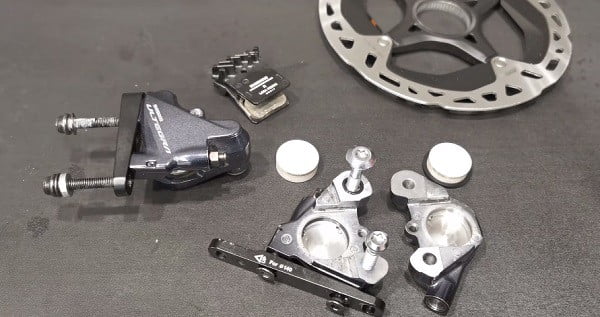
There are a lot of components involved in a simple disc braking mechanism that you have to maintain, but hydraulic disc brakes take things a step further.
There are certain tells that point toward your brakes needing attention and care. The most common of which is noise coming out of your brakes or your brake pulls feeling spongy. In such cases you should be looking at:
- Health of the Brake Pads
- Caliper and Rotor Alignment
- Bent Rotor
- Braking (Hydraulic) Fluid Levels
And the health of the other components in between your lever and brake pads.
Hydraulic Bike Brake Maintenance
Before we get into the various issues that plague these brakes and how to maintain them, we must first have a clear understanding of:
How Does a Hydraulic Brake Work?
The hand lever of the hydraulic brake system uses a piston (also called a ‘master’ piston) to push the brake fluid through the sealed brake line (or hose) to the calipers where another set of pistons (the ‘slave’ pistons) are engaged. This pushes the brake pads on to the rotor to achieve braking.
The hydraulic fluid within the tubing is special and does not flex or compress providing great stopping power and efficiency to your braking mechanism.
How Hydraulic Disc Brakes Work:
1. Noise
The noise coming from your disc brake can be due to a number of reasons. If you do have a noisy brake, even when you are not braking, do an initial checkup to determine the issue: Remove the wheel to visually inspect the pads and the caliper.
Health of the Brake Pads
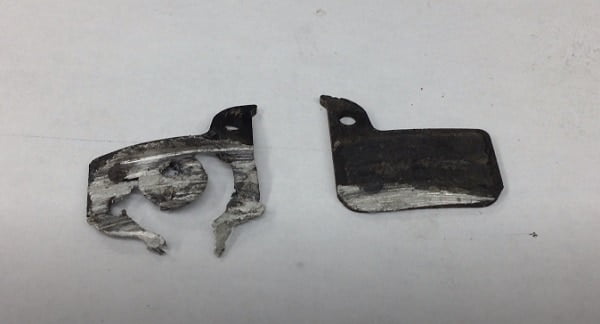
Worn out pads is the most common source of squeakiness coming from your brakes. If you are unsure initially, you can always pull out the pads for a closer inspection.
If you have determined that you have to completely replace the pads, then there are certain measures that you have to take before doing so.
Readjust the Pistons
Hydraulic brakes are self-adjusting. Meaning, as the brake pads wear out the internal pistons adjust themselves to accommodate for the thinner pads to still have maximum contact with the disc. So before you throw in a new set of pads, the pistons need to be reset and pushed back into the caliper.
To readjust the pistons:
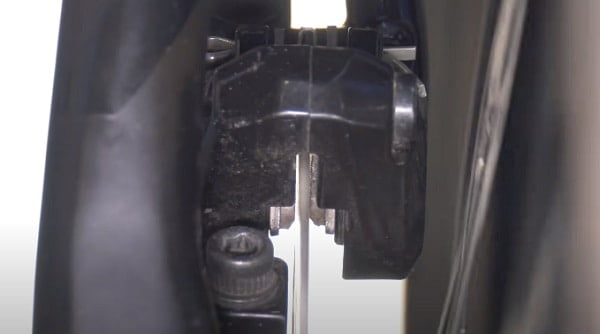
- Find a tool that fits between the calipers nicely. It can be a handle of any tool, like a cone wrench. Plastic or rubber coated surface will ensure low damage to the calipers.
- Press the pistons at the center to have them retract as straight as possible. Uneven retraction might pose problems in the future.
- Go back and forth multiple times to ensure that both pistons are fully retracted.
Now you are ready to put in those new brake pads.
2. Caliper and Rotor Alignment
You want the caliper to be centered around the rotor with equal spacing on each side. If the calipers are misaligned, the rotors are sure to graze against them and become a source of noise.
Steps to realign calipers:
- Loosen both caliper bolts (don’t remove them!) just enough so that the calipers can move freely from side to side.
- Squeeze the brake lever for the caliper you are aligning and hold it down while you retighten the brake bolts. This should allow the caliper to adjust itself around the rotor.
- Release the brake lever to check if the caliper is aligned with even space on both sides of the rotor.
This might take several tries but it is definitely worth the effort.
For a more in-depth procedure, please consult this video:
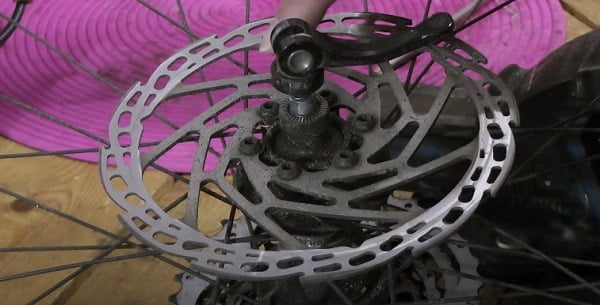
3. Bent Rotor
This symptom can be quite common especially on mountain bikes where rotors tend to be a bit larger and more exposed to obstacles in the track.
Solution: You simply have to bend it back!
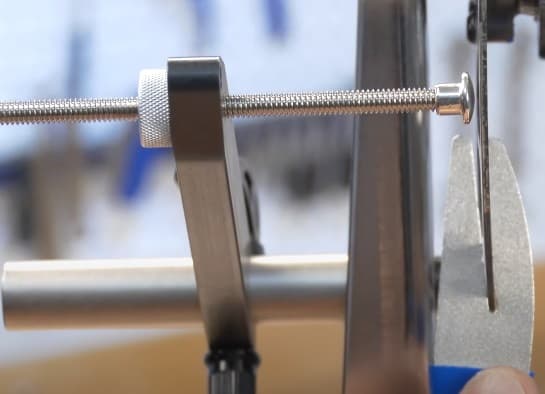
- Leave the wheel on the truing stand to get better access to the rotor. You can leave the wheels on the frame if you so choose. Using a truing stand will allow you to utilize an indicator to make your work easier and more precise.
- You will need dedicated truing tools for your rotor to have an easier time and a more precise result. A crescent wrench can work otherwise.
- Rotate the wheel and visually inspect the rotor going through the caliper to identify the points of contact. You can use a backlight to get a better visual result.
- Once you identify the bent point, move that spot out of the caliper and slightly bend it in the opposite direction. Always use a soft touch in this step.
- Work in small increments to avoid over-bending the rotor.
This process is definitely time-consuming, but a rub free brake is well worth it.
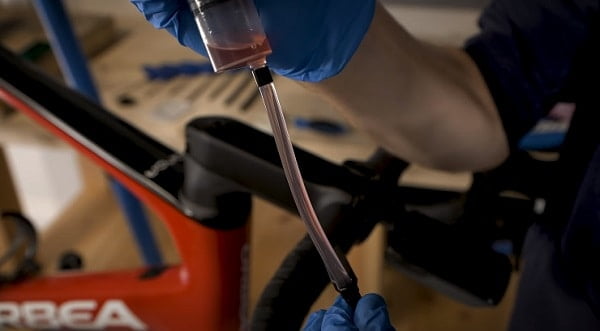
4. Braking Fluid Levels: Bleeding Brakes
As crude as it sounds, bleeding your hydraulic brakes simply means to remove any air bubbles trapped within the brake lines or to replace the fluid as a whole.
The fluid or oil used is a simple mineral oil. If your brakes are Shimano or SRAM, they will have their own version of this fluid, though you can also use other forms of bike brake oils that are available.
Note: Never use D.O.T. brake fluid that is meant for automobiles.
When to bleed your brakes?
- When you pull the lever it feels spongy, the contraction isn’t smooth.
- Slightly pulling on the lever contracts it the whole way.
If you are not sure about whether to bleed your brakes or not you can try this simple test:
Leave your bike hanging vertically with its front wheel up overnight. This will push all the air bubbles to the top of the brake line.
Try the previous two testing methods to determine whether you need to bleed your brakes.
Hydraulic Brake Bleeding Process
- Mount the bike and remove the wheels.
- Remove the brake pads so that they do not become contaminated by the fluid.
- Reposition the bike until the brake line is in a continuous upward slope. This will help release the air bubbles faster, if there is any.
- Set up the bleed tubing by attaching it to the bleed nipple. (Optional) Make sure the sensitive parts are covered with plastic.
- Undo the screws of the reservoir tank and give it a few seconds to stabilize.
- Fill the reservoir to the brim.
- Loosen the bleed nipple slightly (by 1 turn) and operate the brake lever repeatedly. This will help fill up the brake lines and reservoir more evenly and release any trapped air.
- Keep going until the top starts to spill and then close the bleed nipple.
Operate the lever to check for resistance. If it is not stiff yet, repeat the last few steps.
And you are done!
Here is a video tutorial on how to bleed your hydraulic disc brakes:
Other Points of Consideration
Rotor Health
The status of your rotor is very critical to your overall braking performance. Make sure to take some time to inspect your brake rotors for stuck contaminants, like dirt and debris.
If the rotors are dirty or have a lot of stuck residue, gently rub it off with some rubbing alcohol and low grit sandpaper.
Also make sure to pay attention to the wear on the braking surface. If it is too worn then you have no choice but to replace them.
Brake Hoses
Always make sure to check for leaks. The hydraulic brake system is as good as having a completely sealed system.
The leaks can be hard to detect. A sure sign of a leak is that dirt builds up on the leak locations.
If your system did spring a leak then waste no time to take your bike to a bike shop for repair. Unfortunately, most leaks do result in you having to replace the brake line, or the brake system itself, completely.
Frequently Asked Questions
Q1) How often should you bleed hydraulic bike brakes?
Ans.: It really depends on how often you ride and how far you ride. With moderate and above average usage, you can easily go six months without having to bleed your brakes. But that is only true if no other symptoms come to light.
You will need to bleed your brakes if:
- The feel squishy and spongy
- You have to pull the brake lever all the way back before the brakes engage.
Q2) How do I know if my bike brake pads are worn?
Ans.: Even with average use, disc brake pads will wear down over time.
Out of the box, the compound on the brake pads are around 4mm. Over time this will erode and begin to expose the plate behind it. You should be replacing your brake pads just before that happens.
Other reasons thy brake pads wear out:
- Riding in extremely technical tracks
- The calipers are misaligned.
- The rotor is bent.
- The pads are contaminated, usually with oily substance.
Final Words
All of these methods are easy to understand but can prove to be difficult to a novice. If you find yourself lacking in confidence then there is really no shame in taking your bike to your local bike shop to get your maintenance done. It does come at a price but it is very much suggested.
Happy Riding!