
A good braking system in any bike should always contribute to enhancing the overall quality of the bike’s performance. Maintenance of your bike’s braking system – which essentially means getting them examined at regular intervals or even replacing them if parts have been worn out, is of utmost importance.
Safety comes first. So if your bike is to provide you with exceptional braking power and superb modulation whilst complementing the rotating capability of the wheel; you need to know which type of braking system will be an optimum fit for your bike.
The different types of brake systems available for bikes may be small in number, but each is designed exclusively with properties unique to installation based on the type and style of bicycle.
Mechanical disc brakes, otherwise also known as cable-actuated brakes – are popular thanks to the simple setup, great braking, and the fact that usually, they do not cost a lot.
As braking force is applied to the rotor and not the rims unlike rim brakes – mechanical disc brakes have been a massive game-changer in improving the controls and stopping power irrespective of the weather and consequential road conditions.
Buying Guide: Mechanical disk brakes
Disc Brakes
Disc Brakes come equipped with excellent stopping power no matter the weather and where they are being used. They are more common on mountain bikes to tackle the varying conditions that require consistent braking power. Disc brakes are bolted on rotors as the means for braking. As the hub of the bike is fitted with the metal disc, it is revolving around a caliper. The brake pads are located here.
The bike rotor has a strip that runs on the outer part of the disc. This is moving through the caliper. Inside the caliper, there is one piston for either side of the rotor. Pressure on the levers will make these pistons towards the rotor when the pads will come in contact to oppose the motion of the rotor. This contact slows the rotor down, eventually bringing it and the bike to a complete stop.
Typically, they are of two types -mechanical and hydraulic.
Types of Disc Brakes
The two main types of disc brakes are mechanical and hydraulic. The two brakes are different from each other based on their method of controlling the brake pads.
- Mechanical disc brakes: These operate the brake pads via cables, similar to rim brakes. The brake caliper here has a small lever that is pulled via the brake cable. This will cause the brake pads to move and stop the bike. They are more budget-friendly, have easier means of adjustments for better performance, and there are a lot of options in terms of the lever.
The reasons why mechanical disc brakes are more common on mountain bikes are many. The terrains are often dirty and wet, and the components of mountain bikes are obviously subjected to these. Since the surface that is responsible to bring the bike to a stop is on the rotor mounted in the bike hub, dirt becomes less of a factor here. Stopping power will be stronger, efficient, and consistent. Using a mechanical disc brake will increase the lifespan of the whole braking system, thanks to the fact that friction from the mud is almost non-existent. This improved stopping power offers enhanced braking performance. Mechanical disc brakes can also be fixed easily. - Hydraulic disc brakes: In hydraulic brakes, cables are replaced with a system that uses a fully sealed line filled with hydraulic fluids that are forced into the caliper to press the pads against the disc when braking pressure is applied. Hydraulic brakes, therefore, have great smoothness and responsiveness during use.
1. Breakdown of a mechanical disc braking system
We have put forward the key components of a mechanical disc brake system below.
- Brake lever: Brake has actuated on the handlebars thanks to the brake lever.
- Cable and housing: A brake lever will pull on a cable that is running to the calipers, via the housing.
- Barrel adjuster: A barrel adjuster can modify the length of the housing. This can be found on the caliper or brake lever.
- Lever arm: The A-arm of the lever is being actuated by the cable. With the 1 arm lever design seen on most calipers, the outboard pad moves when it is actuated. As the rotor flexes, contact is made with the inboard(read innermost) pad. We also see designs that are using 2 arms for the lever. The movement of the pads is more even for these calipers.
- Pinch bolt: On the lever arm, a pinch bolt is used to secure the cable.
- Pads: The pads are squeezed by the lever arm whenever friction is needed to bring the bike to a stop. Usually, brake pads are using a compound that can act as the “braking” force, and have a backing plate.
- Adjusters: To facilitate the movement of pads outwards and inwards from the rotor, we can see the pad adjusters. In some cases, there is only one adjuster for the onboard pad, while others have adjusters for both.
- Mounting bolts: 2 mounting bolts will secure the disc on the frame. Typically we have Post, Flat & IS Mount.
- Mounting holes: These allow movement laterally concerning the rotor. They are found on the body of the caliper, the frame, or at the adaptor.

2. Caliper
This is the housing that accommodates the pistons and the brake pads. There are two types of calipers:
- Fixed: A fixed caliper uses the opposing pistons, whether one or more pairs of them to clamp the disc on each side.
- Floating: Also known as sliding calipers, it moved following the disc. The motion path runs parallel to the disc’s axis for rotating. The piston on one side will push the braking pad lying incised until it touches the rotor. The caliper is then pulled so that the outboard brake pad comes with it. On either side of the disc, the pressure is applied.
Typically, calipers are made using materials like forged aluminum, aluminum alloys, etc. The idea is to have access to maximum stiffness and less heat formation even under intense braking.
3. Brake pads
They are usually available in 2 key compounds:
- Resin: Resin brake pads are made up of numerous fibers held together by resin. Otherwise known as semi-metallic pads or organic pads, the substance is softer than its metal counterparts. . Designed to arm the user with greater control, it is the softness of the resin pad that is responsible for the noise reduction while braking.
- Metal sintered: Metal particles are combined under high pressure to form the structure of this brake pad. The material choice makes them perfect for surviving in rainy weather. They are versatile and last longer than resin pads, making them suitable for a range of riding conditions.
For touring in muddy or wet regions, metallic brake pads are the go-to option. This is because the pad’s elements can endure precipitation, are made to be more long-lasting, and therefore don’t need to be replaced often. The sintered pads are also great at dissipating heat gained from aerial friction. Resin pads, on the other hand, are amicable for mountainous regions and similar types of dry terrains.
In terms of modulation, the softness of the resin pads allows riders to optimize control. Many may resort to the metal brake pads as they have more” bite” initially. Good management of heat build-up results in less brake fade or loss of braking power. There may be a possibility of riders getting confused with the set-up of the brake pads. To reduce any form of drawback, the different features of the brake types can be utilized to their fullest by applying them in combination- the external pads can be metal while the brake pad inside is resin.
Shimano has designed a special Finned brake pad to reduce heat accumulation and offers more effective heat regulation. The dual-layered fins are constructed with metal and steel. This phenomenon not only helps in heat diffusion, it is also responsible for creating a more durable braking system by reducing maintenance frequency, brake feed, and braking noises.
4. Rotor Sizes
The braking power of a bike is influenced by the size of the rotor. . Bigger rotor sizes boost the leverage of the brakes at the caliper, stopping the wheels faster. A 20mm increase in rotor size is said to boost braking power by 13 to 15 %.
The smallest rotor size is 140 mm and is a minimum requirement when the rear wheels of the user’s bike are being used for braking. 160 mm rotors will however cause the rear wheel to slide, while if they are used on the front – only brakes that offer maximum power should be used. Increasingly 200mm discs or larger diameter rotors are being favored for any steep riding – whether it is fast downhill riding or going up a steep slope, owing to their boosted braking power. 180mm or 200mm rotors on touring bikes will offer great braking performance. They also do not heat up easily and can get rid of the heat faster in comparison to smaller sizes. However, increased size will mean increased weight.
5. Rotor design
Selecting the rotor design – 6 bolt disc or Centrelock is crucial too. Even though they are very similar in terms of design & functionality – they differentiate when mounting on the hubs.
A key can be used to lock Centrelock rotors to the hub, while six bolts are used to achieve the same thing with the 6-bolt design. Manufacturer Shimano has put out a design that will make the Centrelock hub compatible with rotors from other brands, which adds to its versatility. On the other hand, a standard Torx wrench will attach the six-bolt rotors to the hub. Riders will find that Centrelock rotors are placed in a more central position on the hub, which is more accurate. They can be removed with ease and quickly. For the 6 bolt design, care needs to be taken so that the bolts are torqued more evenly during installation. Typically, stainless steel is heat-treated to form the rotors. Nowadays, other materials are being integrated into the rotors too. An example can be the “Ice-tech” rotors from Shimano, where aluminum is used at the core, in the middle of the stainless steel rotors. This helps to better disperse heat.
6. Rotor construction
Stainless steel is usually heat-treated to form, designs that usually are designed with two-pieces. The surface of the steel brake rivets to an aluminum carrier so that its weight is less. These rotors are “true”, undergo less warping, but might strain the budget.
7. Mounting type
The most common mounting type for disc brakes is called ‘post mount’ and it’s found on 99.9% of mountain bikes. They can be easily installed with the big 180mm and 203mm rotors to stop any loaded bike. The ‘flat mount’ type of caliper is becoming more prevalent, especially in the gravel bike category. It is essentially a more compact caliper design that better suits the aesthetic of road bikes. In its best form, it has no adapters and is easy to set up with a perfectly-aligned brake mount. But generally, a flat caliper is tricky to adjust for a couple of reasons:
- There is a disparity in distance between each bolt at the fork (when using an adapter), so one end of the caliper moves more than the other when you make small adjustments.
- The close bolt spacing can amplify any frame imperfections on the rear mount, resulting in a higher chance of rubbing (in particular with an adapter fitted).
Also, some flat mount forks will not allow you to use rotors bigger than 160mm due to design constraints. The measurement of disc brake mounts is based on the distance in millimeters between the center of the two-bolt mounting holes. If your bike has a specific mount and you wish to install disc brakes with a different mounting system you can purchase a disc brake mount adaptor. There are two main types of disc brake mounts:
- IS mounts: 51 mm
- Post mounts: 74 mm
8. Lever
Disc brakes are compatible with Flat or Upright-Bar levers. As this is further broken down, we find Long pull or Linear pull levers, and Short pull levers.
- Long pull levers: These are common on disc and V brakes. They are characterized by the extended distance between the pivoting point of the lever and the cable end. As a result, the cable pull is more when the levers are engaged. The mechanical advantage is more here.
- Short pull levers: They are more common on brakes that use road calipers and cantilever brakes. A short distance between the cable end and the lever’s pivot allows for a shorter cable pull.
9. Number of Pistons
The rotor is surrounded by pistons on both sides (two pistons), which is used to push the brake pad inwards. 4-piston & 6-Piston designs are available too. An increased number of pistons will allow manufacturers to produce brake pads that have larger contact surface areas. They are clamped on the rotor for quick braking. 4 -pistons can be found on tandems and mountain bikes used for more gravity oriented riding. However, the latter designs are not available easily and replacement in case of damage is inconvenient.
10. Adapter
Adapters may need to be used too, which is depending on the rotor size and the frame mount. Nowadays they are sold separately. Frames have a limit for the maximum rotor size that can be mounted on them, and it is better to stay within this limit so that the frame is not damaged.
- Post mount brakes will need an adapter, except for the correct rotor size on the bike that is being used. For example, a bike that is designed for 180 mm rotors can mount the size without any adapters. However, to run a 160 mm or 200 mm rotor here – a 20 mm adapter would be required.
- Flat mount brakes are usually smaller than post mounts, and the frame + fork of bikes that can use this mount are specially designed for the purpose. The max limit of the rotor size for this mount is 160 mm. While this is perfect for gravel bikes, the 160 mm rotor cannot be used for heavy riders or on speedy mountain bikes. If the bike is running a flat-mount brake for the front wheel, the rotor size is either 140 mm or 160 mm. In this case, the adapter that is to be used must have a “front version”. If the flat-mount brake is in the rear wheel, the “rear adapter version” will need to be used to mount the bigger 160 mm rotor.
11. Caliper alignment methods
For mechanical disc brakes, it is important to ensure that the calipers are aligned perfectly over the rotor. This will ensure that the frictional surface of the rotor and the braking pads are running parallel. A proper alignment will reduce any noise, and the wheels would be moving with less freedom. Additionally, it might be able to get the very best output from the brakes.
Single lever arm – adjusters for inner and outer pad
- The inner and outer pads are both using adjusters.
- As we loosen the mounting bolts for the caliper, it floats
- The adjuster on the outer pad is turned in an anti anticlockwise direction. This is followed by a full 360-degree revolution inwards. This leaves space for more adjustments
- The adjuster on the inner pad will now be turned in a clockwise direction until the rotor has the pads locking against it.
- The mounting bolts for the caliper are used to snug the body of the caliper so that the rotor is below it. After the pads have been well aligned, full tightening will take place.
- The adjusters for both the pads are loosened by a quarter or half turn.
Single Lever arm – adjuster for Inner pad only
- The outer arm is moved by the pull of the cable on it. In this configuration, only the inner pad is using an adjuster.
- The mountain bolts are loaded so that the caliper is left floating.
- Adjuster for the inner pad can be turned to the maximum inside, in a clockwise direction. About a quarter of the turn, it is required to back off.
- The lever for the brake is pulled so that the lever can be held tight. This will align the caliper body on the rotor.
- As the mounting bolts for the caliper are snuggled in, the brake lever can be let go.
- The adjuster for the road will be back off by turning a quarter of a full revolution.
Dual-lever arm
- Bolts used to mount the caliper are loosened to make it float.
- The adjusters for both the pads are turned outwards in an anticlockwise direction.
- The lever for the brake is pulled to hold it. If the lever goes back to the handlebar and the brakes do not touch each other – it is advisable to release the lever and tighten the screws used for adjusting the pads by half a turn. This should be repeated until the brake pads are just touching the lever.
- To hold the caliper alignment over the rotor body, the bolts for mounting the caliper are snug on. After the roads have been aligned correctly, full tightening will occur. As this happens, the lever is released.
All the above alignment methods are ended by making the following adjustments.
- The adjusters for the pads are used to move the pads symmetrically so that the pads and the rotor are touching. The lever is engaged and released for checking the feel as the brake slows and stops the bike.
- Check if there is any pad rub. If there is, check the pad alignments.
Alignment is complete as the pinch bolts are tightened by 4 Nm torque, while 6 Nm is needed for the mounting bolts.
Our top pick(s)
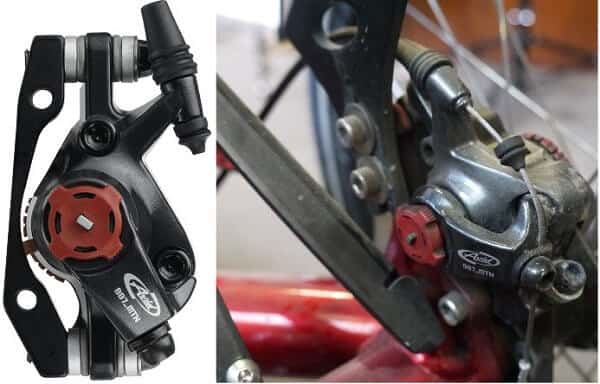
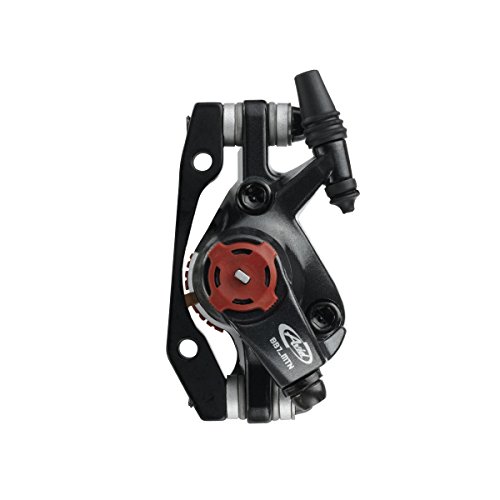
We have picked Avid BB7 Mechanical Disc Brake as our “Overall best choice” from a total of 12 finest mechanical disc brakes that we have reviewed in this article. Although the options are plentiful, we believe that our list of best mechanical brakes offer the best braking performance, adjustability, compatibility, and are using premium materials.

Easy setup & installation; excellent stopping power; can be adjusted easily | Overall Best Choice
The venerable Avid BB7 Mechanical Disc Brake has been the standard for disc brakes for more than a decade. They can be used seamlessly on a wide range of bicycles, for widespread activities such as mountain biking, road riding, traveling on gravel roads, or even backpacking. bike-packing, road riding, or exploring gravel roads. Sporting a great finish, the knobs that are essential for adjustments can be accessed easily. They are used to make adjustments to the inboard and outboard pad so that the wear in the pads are more even. While the braking power is excellent, Avid uses a technology called Tri-Align Caliper Positioning System™ that will align the caliper here. The cable stop is integrated into the caliper so that the cable that is being used for routing and housing are unable to enter the brake, which would have otherwise resulted in cable drag. The caliper is using a metal sintered brake pad that is steel-backed while accommodating a G2 CleanSweep rotor that can be 160 mm, 180 mm, or 200 mm. Further compatible with linear-pull levers, this reliable disc brake is packed with adjustable and easy to use features, while modulating power smoothly.
- Mountable on both front and rear wheel
- Dual pad adjustment
- Tri-Align Caliper Positioning System
- Built-in cable stop
- Caliper body uses 2-piece design, made from forged aluminum
- Weights 329 g
- Compatible with linear-pull / long pull/ mountain style levers that are cable-actuated
A quick view of our list of some of the top mechanical disc brakes:
| Mechanical disc brake | Weight (grams) | Our Ratings |
|---|---|---|
| Avid BB7 mechanical disc brake | 329 | 95 |
| Paul Component KLAMPER | 211 | 94 |
| Avid BB7 MTN | 329 | 92 |
| SHIMANO M375 Caliper | 250 | 91 |
| TRP SPYKE mechanical disc brake | 169 | 90 |
| TRP SPYRE-C | 154 | 89 |
| Avid BB5 MTB w/ G2 Rotor | 335 | 86 |
| TRP SPYKE 180 | 169 | 85 |
| Bluesunshine HS1 disc brake kit | 335 | 84 |
| SENQI bike disc brake | 227 | 82 |
| TEKTRO Aquila MD-M500 | 206 | 80 |
| RUJOI bike disc brake kit | 75 |
12 best mechanical disc brakes you can buy today
Note: We have put up all the rotor sizes that are delivered with the products. This is an indication of the versatility of the brake.
| Mechanical Disc Brake | Preview | Weight (g) | Caliper | Rotor (in mm) | Application | Product Score |
|---|---|---|---|---|---|---|
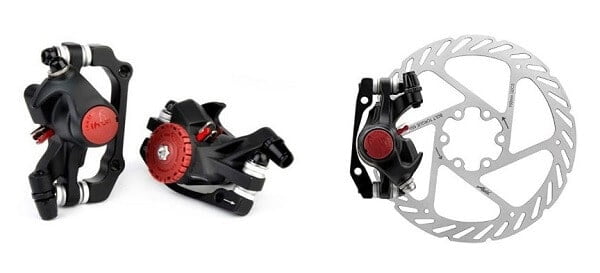
| Avid BB7 |  | 329 | Forged Aluminum | 160/ 180/200 | MTB | 95 |
| Paul Component KLAMPER |  | 211 | 6061 Aluminum, Heat treated Steel | Not included | Road, Cyclocross, Gravel | 94 |
| Avid BB7 MTN |  | 329 | Forged Aluminum | 160/ 180 / 200 | XC, Freeride, All mountain | 92 |
| SHIMANO M375 |  | 250 | Aluminum | Not included | MTB / Trekking | 91 |
| TRP SPYKE | No products found. | 169 | Aluminum Alloy | 160 | MTB | 90 |
| TRP SPYRE-C |  | 154 | Aluminum Alloy | 160 | Road | 89 |
| Avid BB5 MTB w/ G2 Rotor |  | 335 | Forged Aluminum | 160 | Road, Touring or Cross bike | 86 |
| TRP SPYKE 180 |  | 169 | Aluminum alloy | 180 | Off-road | 85 |
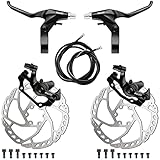
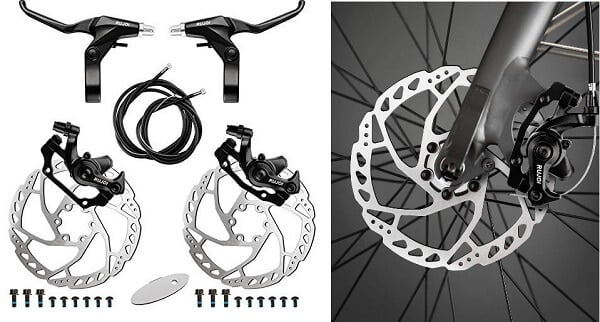
| Bluesunshine HS1 |  | 335 | Aluminum alloy | 160 | MTB,Sports | 84 |
| SENQI |  | 227 | Aluminum alloy | 160 Front, 140 Rear / 180 Front, 160 Rear | Universal | 82 |
| TEKTRO Aquila | No products found. | 206 | Melt forged aluminum | 160 | Mountain | 80 |
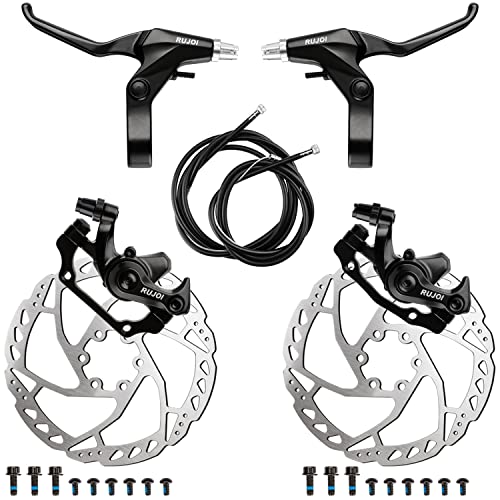
| RUJOI |  | N/a | Aluminum Alloy | 160 , 180 | Road cycling, Time trial, Triathlon | 75 |
1. Avid BB7: Easy setup & installation; excellent stopping power; can be adjusted easily | Overall best choice
- Application: MTB
- Brake Type: Mechanical
- Pad Type: Steel backed metal sintered
- Caliper Material: Aluminum, forged
- Weight: 329g
- Rotor: G2 CleanSweep 160 mm/ 180 mm/ 200 mm
- Brake caliper: Post Mount
- Brake lever: Not included( V brake lever, 1.5-2.5 finger)
- Mechanical advantage: At 329 g per caliper, the BB7 is one of the lightest brakes that are available. It features a “dial-in” brake pad whose position allows clearance for the rotor in a matter of seconds. It successfully offers modulated braking power that is needed for fine control on the trails.
- Inboard and outboard pad adjustment: This will help to stabilize the wear to the brake pads, and allow adjustments to the brake pads without any tools. There are red knots that will need to be used to ensure that the inboard pad and rotor are separated by a distance that is half of that between the outboard pad. This reduces the flex of the rotor to touch the inboard pad. Less flex means quicker engagement of the brakes and even pad wear.
- Tri-Align Caliper positioning system: This mechanism from Avid adjusts the caliper’s position concerning the rotor in seconds. There will be no need for “trial and error”. The CPS bolts are made loose, and the lever is engaged while they are tightened again. This will ensure that alignment is perfect.
- Spring tension adjustment: This built-in feature will minimize the chances of cable drag. The cable stop that has been integrated here stops the housing and the routing cable from perforating the brake at odd angles.
- G2 CleanSweep rotor: This is made using a special manufacturing process that allows it to resist warping and allows optimum braking. Avid has used a unique design so that the entire brake pad is in touch with the rotor. 160 mm should be used for XC and normal riding. When more powerful braking is needed for heavy or aggressive riders, 180 mm can be used. 200 mm will serve well for downhill bikes that require more braking power.
- Brake pad: Steel backed metal sintered brake pads are being used here. They offer better braking power and have a longer lifespan. These pads will outperform rim brakes regardless of the conditions.
- Compatibility: The caliper can be used for both front and rear brakes, and is compatible with all cable levers fit for mountain-style riding.
- Replacing the brake pads might be difficult for users who are not mechanically inclined.
- Not compatible with Centerlock or HSX rotors.
- The cables are fitted with rubber seals which may wear off after a period of time.
We can confidently say that the Avid BB7 is the absolute best mechanical disc brake that money can buy. There is so much adjustment that is available on this caliper, especially the inboard and outboard pad adjustment. We believe that this is a huge advantage to other Mechanical Disc Brakes.
Aligning the brake was very easy too. We especially liked the CPS bolts and circular fitting washers, which are an amazing innovation! We found the set-up tutorial on YouTube, which was convenient. BB7s have plenty of power for anything short of doing extended down hilling. If you ride super steep downhill trails that are long, these will work too. Deceleration was good too, irrespective of the fact that this is a mechanical brake. When we used the brakes for the first time, it was necessary to “break-in” the pads by riding the bicycle down a street. As we squeezed the brakes, they warmed up. After the initial setup the brake pads will slowly wear off, and we needed to “dial-in” the adjustment knobs on the calipers. The outside knob was easy to adjust; however, the inside knob was difficult to reach as the spokes got in our way and stopped us from getting a good grip. Finally, we used a Torx bolt for adjustment. is however much harder to do by hand, as the spokes of the wheel prevent you from getting a good grip. Fortunately, there is also a Torx bolt so you can adjust it with a tool.
The inside pad should be kept very close to the rotor, the outside pad (that moves) can be a little bit further away. You can dial them in until they begin to rub the rotor and then dial them out again until the rubbing stops.
We have included a link for the manual of the Avid BB7 below:
The link below will help you make adjustments to the Avid BB7 Mechanical Disc Brake.
Avid Mechanical Disc Brake BB7
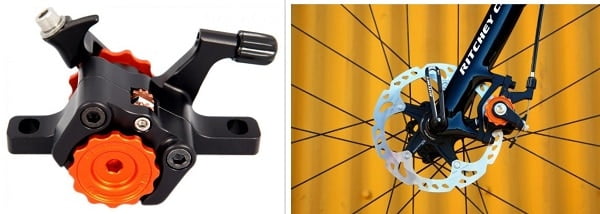
2. Paul Component KLAMPER: Super stiff; offers more power; easily adjustable | Premium choice

- Application: Road, Cyclocross, Gravel
- Brake Type: Mechanical, 1 piston
- Pad Type: Kool-Stop Avid Elixer SRAM MTB XX Sintered Metal Compound
- Caliper Material: 6061 Aluminum, heat-treated Steel
- Weight: 221g
- Rotor: Not included (suggestions are Shimano Ice-Tech, Sram, Avid)
- Brake caliper: Post Mount
- Brake lever Actuation/Size/Type: Short Pull
- Brake Lever: Cantilever/Short Pull SRAM road levers
- Short pull version: Even though the actuator arms can be switched for the linear-pull, short pull, & Campganolo pull – the Klamper Disc Calipers feature the short pull actuator arms. The manufacturer suggests using Cantilever with this disc brake, as it is not delivered with a lever. Compatibility with road levers like SRAM and combined brake levers is also ideal.
- Powerful braking: The disc brake can offer more braking power thanks to the large ball bearings and 12L14 steel positions. This alloy permits the pistons to be “heat treated”. This will strengthen the ramp of the bearing so it is resistant to putting to offer smooth pull of the lever. The fact that thrust bearings from flat needle rollers are used is an advantage too.
- Optimum Design: To add stiffness to the caliper body, fangs were added to it. The outer body was beefed up. Fangs to the inner backing plate for stiffness, while the outer caliper body was beefed up as well. Several revisions were made until the final product. This was the same for the adjusters for the pad. The goal was to retain power with easy adjustments. Therefore, the circumference was designed with detentes that could be identified via ball plungers using springs.
- Kool-Stop Pads: Kool-Stop brake pads that are using sintered metal are preferred for the brake pads here. They will deliver performance braking in all sorts of conditions – downhill, trials, and XC. Their break-in period is shorter so that it can deliver the best braking power for rides that will test the durability and braking power of the pads.
- Oversized dial: The Klamper is using a single-piston, which offers smooth lever movements. This is mainly because the actuator of the pad has a needle bearing. This pushes the inboard pad closer to the rotor and limits the flex. This is addressed by the notched dial of the Klamper, which is unique and oversized.
- The brake was not delivered with any rotor.
After we got our hands on a set of Paul Components KLAMPER, we could not wait to test them out. The design featured a single-piston, like that we saw in the BB7 from SRAM. Adjustments to the pad could be made without tools. We appreciated the feel of the level, actuation smoothness, and durability while testing this disc brake out.
We paired this brake with centreline rotors from SRAM and decided to use the Pro cables with brake housing from Jagwire. This was a perfect combination, and we did not have to maintain the cable share at all. The fact that these cables were slicker boosted durability. The caliper was designed to incorporate more stiffness, and yet the weight was only 211g. Paul had to address the fact that designs that use single pistons must have the rotor and inboard pad close to each other so that minimal flex will put the outboard pad in contact with the rotor. The solution was to use notched dials that were large enough to grasp and turn easily. Aluminum alloy 6061 was used for the caliper body, while metallic pads from Kool Stop were the brake pads. Setup was easy and did not need much maintenance. We appreciated the blocky look of this brake caliper. It is certainly the best fit for gravel adventures on a road bike.
The link below has the instruction manual for Paul Component KLAMPER.

Paul Component KLAMPER
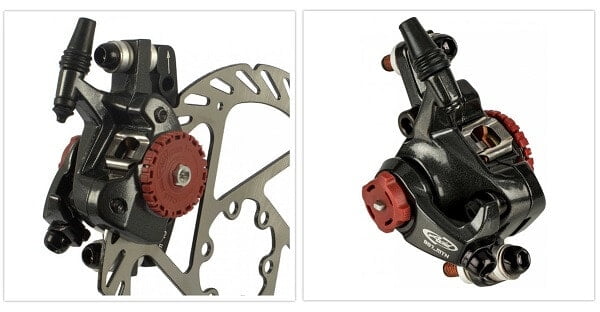
3. Avid BB7 MTN: Precise modulation at the limit of tire adhesion; simple adjustment for pad wear

- Application: XC, Freeride, All-mountain
- Brake Type: Mechanical, 2 pistons
- Pad Type: Sintered Metal
- Caliper Material: Forged 2-piece Aluminum
- Weight: 329g
- Rotor: 160 mm/180 mm/200 mm, G2 CleanSweep 6-hole
- Brake caliper: Front Post Mount
- Brake lever: Long Pull Mountain Style
- Brake set: This brake set includes the caliper, 160mm G2 Clean Sweep with rotor bolts, and two brackets for mounting the front and rear.
- Braking modulation: This brake for mountain bike rotor offers braking modulation that is fine-tuned so that the lever has better control over the clamping force on a disc.
- Tri-Align Caliper Positioning System: This technology from Avid makes it very easy to adjust and install a disc brake. The caliper will align perfectly without any shims. The pads will become parallel with the rotor in a matter of seconds so that positive modulation for powerful braking is possible in all conditions.
- Dual pad adjustment: There is a set of knobs for both the onboard and outboard pad. These knobs help to minimize the distance between the rotor and the knobs so that the inline barrel adjusters do not have to be twisted. This pad adjustment ensures that they wear on each pad is more even.
- Forged aluminum caliper: The body of the caliper is using aluminum that has been forged so that it is more durable. Other advantages of using this material are enhanced performance, lightweight, resistance to high temperature, and versatile use.
- G2 CleanSweep Rotor: The G2 CleanSweep is available in 160 mm, 180 mm, and 200 mm. This brake set comes with the 160 mm rotor, which is ideal for cross country, and every riding it has been made with steel that has been heat-treated to withstand any force effort braking. The design has edges that remove any muck or grime that accumulates on the rotor and offers maximum braking power with cooling properties.
- Sintered brake pads: These pads are i. Durable; ii. Better at handling heat; iii. More resistant to fade under heavy braking loads, which is perfect for downhill; iv. Able to perform co distantly even in wet conditions.
- Compatibility: Long pull levers, or linear-pull levers can be used with this disc brake set. They are more favored thanks to their ability to pull twice the cable and offer a mechanical advantage. The cable would need to be purchased for this brake set too.
- For descents that will test the technical ability of the rider, these brakes might display a tendency to lock up.
After testing the Avid BB7 MTN, we can confidently say that the manufacturer has made significant efforts to bring about changes to this product. We find a disc brake that has been engineered very well and maintains high quality for the products they offer. The fact that the kit included mounting brackets of different types was well appreciated. This allowed us to mount the brakes without any additional hardware, and we could check compatibility with different frames. However, for installation & adjustments – we found YouTube videos to be more helpful than the instruction sheet that was provided with the kit.
After mounting these brakes, the first thing we noticed was the smoothness of the brakes, and the amount of control it offered us. The inboard pad here can be adjusted using a knob, but we could not reach it properly using our fingers. Instead, we tried the Torx driver that came with the kit. This was very convenient when we wanted to make adjustments while testing the brake on the road. We paired the BB7 with a lever from the same manufacturer – SD7. The resulting configuration offered modulation & braking power that we thought could rival hydraulic brakes easily. We would, however, ask you to go easy on the front brakes. Any imbalance in the weight, when the front brakes are grabbed hard – might/will throw you forwards, and off the bike. Overall, this inexpensive but high-quality product will deliver excellent performance compared to many high-end models.

Avid BB7 MTN
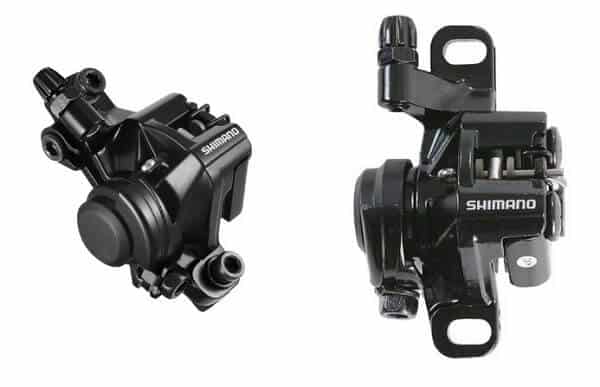
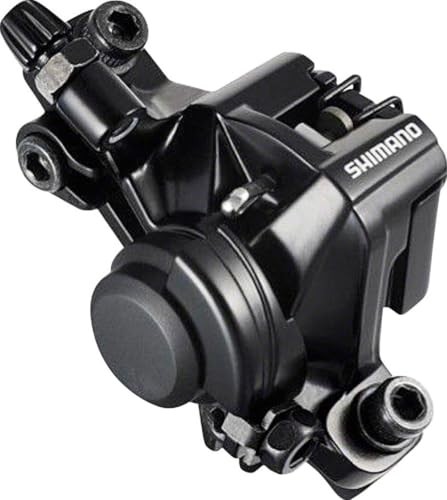
4. SHIMANO M375: Caliper only; offers significant pad clearance; braking power is reliable and modulated

- Application: MTB / Trekking
- Brake Type: Mechanical, 1 piston
- Pad Type: B01S Resin
- Material: Aluminum
- Weight: 250g
- Rotor: Not included (SM-RT10, SM-RT30, SM-RT26)
- Brake caliper: Post Mount, Front/Rear
- Brake lever: Not included ( Long Pull, V-BRAKE BL, 1.5-2.5 finger )
- Cable actuated brake: The fact the caliper is cable actuated suggests that it would be possible for the user to get disc upgrades using the V brake levers that are compatible with this brake.
- Design: The post mount design is compatible with a range of adapters so that users can have several options for rotors, fork, and frame. The single-piston ensures that the design does not become heavy. This ensures that when though the braking control may feel light, its performance is always maximum.
- Pad clearance: When the brake pad and the disc are running optimum clearance, issues such as overheating can be avoided. A 20 percent increase in clearance will ensure that the brake pads have a longer service lifespan. Not much maintenance will therefore be needed.
- B01S brake pad: This is arguably the most popular design from Shimano, thanks to its compatibility with a wide array of MTB & Trekking disc brakes. The pad uses a synthetic resin that is backed on a steel plate. Thanks to the softer pad compound – these brake pads make less noise in comparison to metal sintered pads. The design offers great modulation and offers great performance no matter the weather conditions.
- Ease of installation: During installation, the only tool that is needed by the user is a 5mm Allen key. Neither did the rotor or the calipers need any other tool. However, it may take some time so it is a good idea to be patient.
- Compatibility: The manufacturer suggests using RT-10, RT-30, and RT-36 with this disc brake bike. It should be mentioned that all these are center lock rotors, which will provide great stopping power no matter the conditions. Even though the 2 finger V brake levers can be used with this brake caliper, 4 finger V brake levers will offer more power.
- Leisure cyclists will love this caliper; however, it cannot be used for freestyle.
The Shimano M375 Caliper seemed perfect for us as we did not want to replace the entire braking system. It was budget-friendly and was easy to install too. The first thing we noticed about the caliper was that the clearance of the pads seemed to set back farther. We appreciated this as it meant less maintenance.
To mount the calipers, we allowed the calipers some freedom by installing the hand of the bolt tightly. The brake lever that we got for this caliper was engaged so that the caliper adjusted itself on the mount so that alignment with the rotor was perfect. As we tightened the mounting bolts to secure the caliper, the stationary pad on the inside seems to be in contact with the rotor. We searched for the bolt that would adjust this. After we did, the road was backed off by 1 click until the wheel was able to spin freely without any pad rub. We ensure that the pad would have room for forward adjustment when it will wear down later. In the search for an inexpensive entry-level mechanical disc brake system, we can recommend the Shimano M375 calipers as a great option. For convenience, we have provided the link for the instruction manual of the BR-M375 below.
SHIMANO M375 Caliper
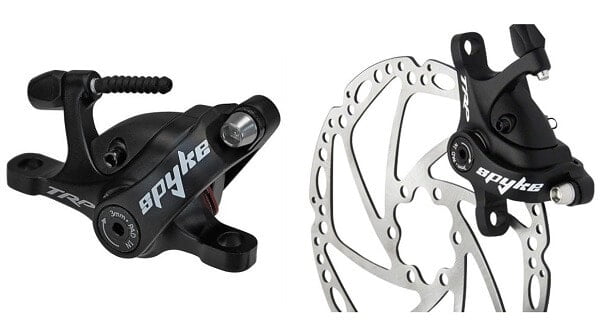
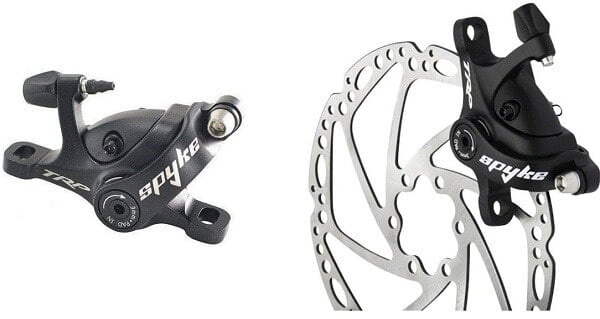
5. TRP SPYKE: Dual-piston design; Lightweight; Greater braking power; Easy to adjust & install
No products found.
We really wanted to get our hands on the dual-piston mechanical disc brake from TRP SPYKE for a test run. Even though dual Allen screws of 3mm are to be used for pad adjustment, the arm of the Spyke has this labeled. We found it to be robust, inadequate addition to the fact that the manufacturer offers it tuned for the “mountain-brake-lever-pull” ratio. Brake pads from Shimano are compatible with the Spyke, so getting a replacement in case of damage would be easy for us.
Setup was easier in comparison to other mechanical disc brakes. We did not need to center the washers and found the brakes to be centered owing to the pistons that were dual actuated. We needed about 30 to 40 minutes for the installation and tuned the brakes just by riding them around for a while until they were “dialed” for use on the trails. We took the disc brake for trail riding, and the first noticeable thing was the more than “average” feel on the lever, which offered enhanced braking power. We could hardly recognize any difference, which was great as the Spyke has its brake cable actuated. We would suggest you wait for the Spyke to display its best performance after the period it needs to “break-in”. In this time, more brake material will deposit into the rotor. Basically, if you prefer 4” fat tires, then the SPYKE is the brake for you. They are designed to deliver seamless braking performance work as it was designed specially to be compatible with mountain bikes that could be used in winter, without the risk of any hydraulic failure.
We have provided a link below for the instruction manual for TRP SPYKE.
No products found.
TRP SPYKE Mechanical disc Brake
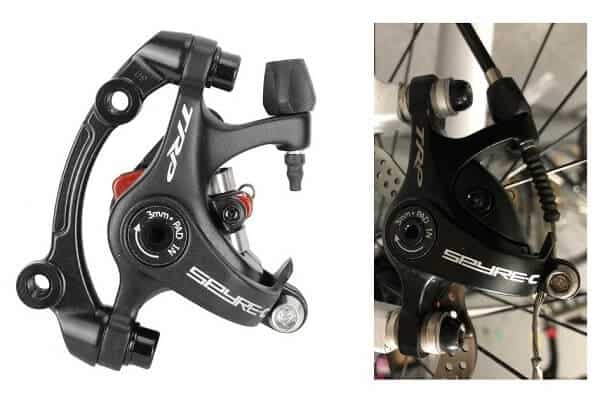
6. TRP SPYRE-C: Excellent quality; budget-friendly; offers extensive braking power; adjusted easily

- Application: Road
- Brake Type: Mechanical
- Pad Type: TRP Semi-metallic
- Caliper Material: Aluminum Alloy
- Weight: 154g/caliper per wheel
- Rotor: 160 mm, 6 bolt
- Brake mount: Post Mount, Front/Rear
- Brake lever: All cable actuated road levers
- Brake Set: The delivered product has a 160 mm rotor for the rear or front wheel, along with rotors, and a post-mount adapter.
- Smooth Brake: Thanks to the brake pads that are dual activated pads, the brakes feel extremely smooth. Operation is almost effortless thanks to the enhanced braking modulation. This is ideal as there is no tendency of “grab”, which would have made modulation difficult. Contact with the brake pad is smooth.
- High Quality: Thanks to the advanced technology that SPYRE-C uses, there is more noticeable innovation on the surface being used to decelerate. When it is being used, the rotor will not be facing towards the road, but away. This reduces the risk of surface water to form. Additionally, the rotor has holes so that any water from the brake pads is drained out.
- Higher Adjust Quality: We see that the adjustment functionality for the pads is excellent. A simple hex key allows moving the pads into & out of the rotor. Barrel adjuster can also be used for tuning the setup so that pads are in an excellent position to deliver the best braking performance.
- Quality Performance: The feel of the brake is progressive and delivers optimal performance. Additionally, we can also notice benefits like even pad wear, better pad positioning, and boosted braking power.
- Brake pad: The stock pads are using resin compound, which usually works well in dry conditions, and is quiet even when it gets hot.
- The tension in the spring could not be adjusted.
We replaced the “Front” caliper disc brake with the TRP SPYRE-C units. It came with a 160 mm rotor for the dual-piston front caliper. The result was enhanced braking power and considerable modulation for the front wheel. We used barrel-shaped spacers made of metal for mounting the calipers on the rotor so that they were spaced correctly on our road bike. Check to see if the delivered product comes with a bracket that can be used for most mounts with “vertical-bolt”.
With a strong brake spring that is acting snappy, the action feel was light. This was certainly better in comparison to a cantilever setup. The sintered pads offered considerable grip and operated quietly during our test drive. We used road tires that were 23mm – while this might not be relevant, we wanted to mention that road bike tires have a better grip on grass and dirt terrains in comparison to a normal tire used for cyclocross riding. The Spyre has a natural ability to offer more “skid”, as we saw while coming downhill fast. The tire naturally locks up less, so we were intrigued to draw up a conclusion. However, as we used a different mechanical disc brake during our test – we were able to ”feel” the difference. The rotor size, we believe, is the game-changer for the SPYRE – as it is sporting a 160mm rotor here which is essentially offering more braking power. We even decided to try out a descent that involved very steep roads that were narrow and slippery due to rain. Visibility was not ideal as well, as we only had the headlights on. The gradients at some places were more than 20 percent, so we had to drag the brakes constantly to avoid skidding and stay on the road on the hairpins. We could feel that the brakes were really tested here. However, they did pass with flying colors. It was able to deliver consistent braking performance and we could really make our decisions depending on the brakes. Modulation was good enough so that we could avoid skidding, but hard. Being able to control the force of braking was really appreciated, and at no time did we feel any change or fade of braking power.
To help you with installing and adjusting the SPYRE-C, we have provided a link for the manual below.
Trpbrakes.com

TRP SPYRE-C
7. Avid BB5 MTB w/ G2 Rotor: Sheds heat faster; Mono-block design for caliper

- Application: Road, Touring, or Cross bike
- Brake Type: Mechanical
- Pad Type: TRP Semi-metallic
- Material: Forged 2 piece Aluminum
- Weight: 335g
- Rotor: 160 mm, G2 clean sweep,6 bolt
- Brake mount: Post Mount, Front/Rear
- Brake lever: Not included (All Linear pull brake lever)
- Tri-Align Caliper Positioning System: This technology from Avid will align the caliper on the rotor instantly. The CPS bolts are made loose a little, which is followed by squeezing the lever while tightening them again while the caliper adjusts. The pads are aligned so that they are parallel with the rotor. This allows positive braking modulation and strong braking, no matter the conditions.
- Inboard pad adjustment: Only the inboard pad can be adjusted on the Avid BB5. This can be used to dial the distance between the pads and the rotor for more even pad wear.
- Tool-free pad replacement and adjustment: Positive and powerful braking is a great feature of the BB5, which is facilitated by the fact that pad wear is always adjusted, thanks to the fact that almost no tools are needed for this.
- G2 Cleansweep: The 160mm G2 CleanSweep rotor that is offered with the Avid BB5 uses cross drill technology. This allows the rotor to dissipate heat and carry less weight. Thanks to this, the feel at the lever is always consistent so that speed control is always in the hands of the rider.
- Brake pads: The brake pads for the BB5 used an organic compound, and were backed by a steel plate. They responded instantly while having a longer service life – irrespective of the weather.
- Compatibility: Levers that are to be used with side-pull brakes such as Avid’s Speed Dial series and FR5 levers can be used with the Avid BB5. It is best to use brake cables and housing of the best quality too.
- The brake pads for the BB5 are smaller in size.
We tested out the Avid BB5 on a mid-range MTB, and we can say that they can deliver a braking performance that is on par with U brakes. The key, as we found out, was adjusting the disc brake properly. If this is ensured, the braking power will be more than enough. However, we felt that BB5 might not be a good option if you engage in several hours of hard pedaling every week. Even though the adjustments were very easy to make, the brake pads were wearing off. With little investment, these brakes do provide value for the money that is spent on them. Thanks to Avid’s CPS, caliper adjustment was a piece of cake. Pad adjustment was straightforward too, as a knob that knurled on the monobloc design of the caliper adjusted the pad. The outer pad was adjusted using a barrel adjuster. This was of course after the system had dialed out the initial stretch for the cable. Ideally, we found the Avid BB5 to be perfect for riding cyclocross.
We also used them to upgrade a tandem bike that was running cable-actuated disc brakes too. Again, the mounting design and the adapters were perfect. Both inboard and outboard pads could be adjusted but via separate mechanisms. We had some issues to block resonance, which was easier as we became accustomed to it. With great aesthetics, Avid BB5 transformed the tandem bike and provided the confidence to engage in fast downhill descents.
We have included the instruction manual for BB5 below.

Avid BB5 MTB w/ G2 Rotor
8. TRP SPYKE 180: Mechanical advantage; powerful braking; easy setup and maintenance

- Application: Off-road
- Brake Type: Mechanical, 2 pistons
- Pad Type: Resin with Metal Fibers
- Caliper Material: Aluminum Alloy
- Weight: 169g
- Rotor: 180 mm
- Brake mount: Post Mount, Front/Rear
- Brake lever: Not included (all linear-pull levers)
- Dual piston design: The brake calipers for the SPYKE series provide the best performance when being used off-road. The caliper is dual-sided( read dual pistons ) so that it can offer superior braking performance by providing a clamping force that is distributed evenly and accurately. There are integrated covers that will protect the pads from mud and rain too.
- Even pad wear: Distribution of pressure is more even in this setup. This offers greater control at the bite point. As two pads are touching the disc at the same time, pad wear is more even and users will feel more “initial” bite.
- Barrel adjuster: The barrel adjuster should be used to get done with the adjustment process in a short time and if the necessary tools are not in hand. As the barrel adjuster is turned anticlockwise to back it out, the distance between the pads will decrease as the actuator arm has the more “pre-load”. If there is rotor rubbing, turn the adjuster clockwise to decrease this “pre-load” so that the pads are not near the rotor. If set correctly, pad wear can be compensated at the barrel register by minimal adjustments. However, in some cases – this reduces the leverage and the arm range of the actuator. The manufacturer recommends adjustments of the right & left-pad by independently setting their initial positions. This will reduce how much the barrel adjuster is used in the adjustment process.
- 180 mm rotor: SPYKE has increased the leverage ratio of the brake by increasing the rotor radius here. This essentially enhances the feel of the power of the brake while being used. In addition to this, the heat capacity of this larger rotor will be more, as the brakes are engaged for a little time here. The surface area will be more too. This size is recommended for riders who are heavy and if the user is looking for more versatility.
- Recommended lever: Typically, all levers that are linear pull can be used with this brake. Ideally, they should have a design that is ergonomic and if possible “2-finger”. Return spring, the hinged lamp that is forged, and Teflon bushings are some of the other ideal features. An ideal example would be the “ML800 MTB Brake Lever” from TRP, which is the same manufacturer.
- For certain activities, the brakes offered less power in comparison to their hydraulic counterparts.
We received the back caliper with a 180mm rotor as the deliverable product for the TRP SPYKE-180 here. This post mount caliper was used to replace the 160mm disc brakes on a Hayes MX-1, where the new caliper is 180mm. This was perfect as now we had a reference to compare this disc brake caliper to.
This disc brake offered braking power that seemed to increase progressively so that brake modulation was smooth. The dual actuated design also meant that pad wear was more even and there was no warping of the disc. Even if you are mechanically inclined, you can set up the SPYKE-180 easily.
For more or less the same amount of lever force, TRP SPYKE-180 seemed to offer twice the braking force in comparison to the MX-1. We were able to make “panic” stops over distances that got shorter and shorter as we tested the brakes out. This we believe was due to the combination of the dual brake pads and the larger rotor. We noticed greater pad clearance than before when the brakes were not engaged, which significantly helped to reduce stuffing noises that we termed as ” non-braking noise”. For enhanced braking control, we also switched the cable guide that was standard spiral-wound here – with a cable guide that could not be compressed. We would suggest you select the lever for this disc brake with care, as we need a linear-pull lever for the SPYKE.

TRP SPYKE 180
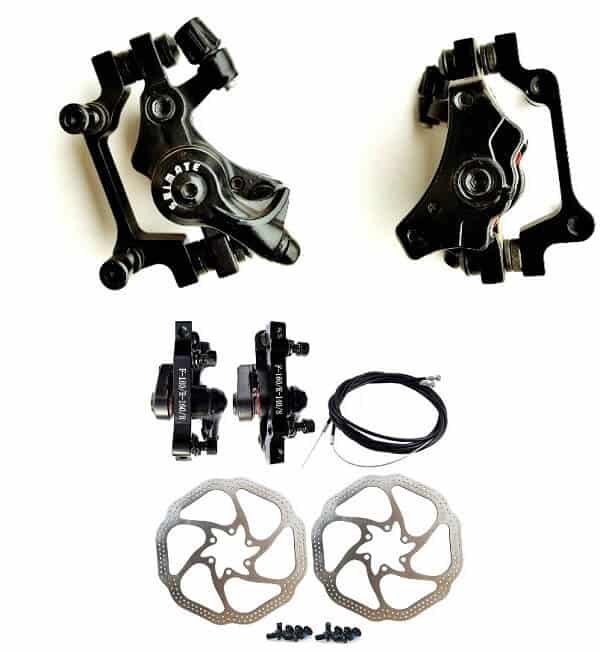
9. Bluesunshine HS1 Disc Brake Kit: Heat shedding rotor; BB7 brake pads for greater braking power

- Application: MTB,Sports
- Brake Type: Mechanical
- Pad Type: Organic
- Caliper Material: Aluminum alloy
- Weight: 335g
- Rotor: Stainless Steel HS1 rotor, 160 mm
- Brake mount: Post Mount, Front, and Rear
- Brake lever: Linear pull Brake levers
- Brake kit: This kit for mechanical disc brake comes complete with two sets of rotors and calipers, for the rear and front wheel of the bike.
- BB5 brake pads: This organic brake pad delivers instant and quiet braking performance consistently. The backer material is made of steel to provide boosted braking power. They will perform consistently, no matter the weather.
- Smooth power modulation: We know that brake modulation is essentially the ability of a lever input to control the clamp force amount on a rotor. Thanks to the ability of this disc brake to modulate braking power smoothly, users will be able to reach the maximum braking power and not “lockup”.
- Lever compatibility: Almost all levers that are linear pull can be used with this disc brake. The pivot points and end of the cable are further away from each other. This allows the lever to be able to pull a greater length of cable when the lever is moved.
- Aluminum alloy calipers: The use of aluminum alloy as the material for calipers is preferred due to many advantages. Aluminum alloy boosts the fatigue performance of the caliper, boosts stiffness by increasing the area of the cross-section which also allows better fit, and saves weight despite the same braking performance.
- HS1 rotors: Stainless steel 160 mm rotors are being used here. The relative hole distance stands at 44, while the adjacent hole distance is 22 mm. It is basically a “Heat shedding” rotor. The design is cross-drilled so that there are no overheating issues. This does not compromise durability, while the weight remains low. Heat regulation here is far better, while the rotor actually offers greater braking power in wet conditions by shedding water. With a lighter weight, reduced wear, and boosted overall control – this technologically enhanced rotor is using the mounting pattern for 6 bolt IS.
- The operation was fairly noisy with this brake kit.
Since we had the option of choosing either the BB7 or BB5 pads with BlueSunshine HS1 Disc Brake Kit, we opted for the BB5 as the size is larger. After testing them out for a period of 4 weeks, we did not face any overheating issues.
The HS1 rotors were the other noticeable aspect of this brake kit. Once we set them up, they worked really great for us. There was rarely any fading, and it delivered quiet braking which was consistent throughout. We noticed a significant difference in the braking feel and modulation, obviously in a positive manner. We wanted to test the braking power of the rotor in wet weather, and did so. It was true to its words and offered enhanced performance even in the rain. The descending ability of this rotor was excellent, and it was surprisingly cool even though we worked up a sweat. Thanks to the pairing with the BB5 brake pads, this configuration can withstand a lot of abuse and performs very efficiently. However, the noise was a major issue for this brake kit.

Bluesunshine HS1 Disc Brake Kit
10. SENQI Bike Disc Brake: Brake pads positioned with easy and accuracy; universal bike compatibility; can be used as Front or Rear brake

- Application: Universal
- Brake Type: Mechanical
- Pad Type: Organic/Semi-metallic/ Metal Sintered
- Material: Aluminum alloy
- Weight: 227g
- Rotor: 160 mm F; 140 mm R (Front) / 180 mm F; 160 mm R (Rear)
- Brake mount: Front & Rear
- Brake lever: Linear pull Brake levers
- Versatile: This disc brake can be fit on either the front or rear wheel here. When it is used as “Front Brake”, rotor sizes are 160 mm & 140 mm, for the front and rear wheel respectively. This will change to 180 mm & 160 mm when it is being used as the “Rear Brake”.
- Aluminum alloy caliper: The use of aluminum alloys in this disc-brake improves wear resistance and enhances the ability of the structure to withstand heat.
- Brake Pads: The manufacturer suggests using any brake pad that is compatible with Shimano-Deore XT-XTR-LX-SLX, Hone Alfine Saint. The material for the brake pads can also vary – from semi-metallic, resin, or metal sintered pads. By adding alloys, the wear resistance can be increased, as well as raising the temp strength. No matter the choice, the brake pad should be to provide sufficient braking power to stop even in a fraction of a second, and not make any noise. Additionally, it should also be able to fit a wide range of rim sizes – 20”, 26”, 27.5”, 29” etc, and different rotor sizes. This is crucial because we are using different rotor sizes for both Front & Rear brake applications.
- Caliper Tolerance: The width of the caliper’s center to its edge that is the nearest to the tire is between 1.2 to 1.8 mm or 2 mm.
- Bike Compatibility: This MTB disc brake for bikes can be used with all types of bikes, which is great as it does not limit its capability.
- Adjusting the caliper can be troublesome.
Available in black and white color – the SENQI Bike Disc Brake is a great option for disc brake systems for bikes. The fact that they can be used on any bike type, and can be used easily for both Front and Rear wheel brake application is a statement of how versatile the design is.
We decided to swap the brake pads that came with this bike disc brake with a resin pad from the brand Hardheaded Ram, as the manufacturer suggested using any resin, semi-metallic, or metal sintered brake pad that is compatible with “Shimano Deore XT XTR LX SLX Hone Alfine Saint Disc Brake”. There is only one disc brake here, and it worked pretty well for us. Installation was fairly simple with a great fit. We did take some precautions though, before taking it out for use. The brake line was screwed in well so that it did not go loose during riding. While changing the brake pad, we found that the pin that is to be screwed/unscrewed while changing the pads is on the opposite side. So the brakes were fully engaged by holding onto them while the pads were unscrewed out. For adjusting the caliper on the opposite side, we used the screw that has an Allen head. This screw is pushing behind the pads so that it is not far from the disc.

SENQI Bike Disc Brake
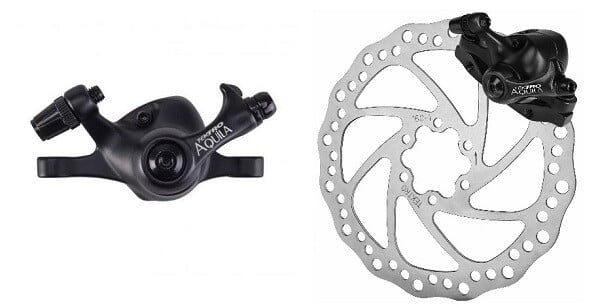
11. TEKTRO Aquila MD-M500: Wave rotor design; better braking in wet conditions; less brake fade
No products found.
We found the TEKTRO Aquila MD-M500 to be a great disc baking system, which offers substantial power for braking & modulation. Featuring the best materials for premium performance and durability, it is highly resistant to external factors such as the weather and impact. Setting them up was comparatively easy, as we used the mounting bracket that was delivered with the product. The pads were easy to install too and required less maintenance. We were able to make adjustments easily so that the braking response was smooth and balanced. Under pressure, they did not squeal much, which was appreciated. After taking them out for cleaning, we were able to reinstall them easily too.
On the other hand, in the beginning – there were some issues. We did not experience the great braking right away and had to make adjustments here too. We decided to take a look at the manual and removed the brakes from the bike. After bending the pads for a better fit, and adjusting the reach – we were able to feel the braking power we were looking for, during the test runs. Reinstalling the pads again was simple too, and we were left bemused at how easy the adjustments really were. The mounting bracket for the caliper was designed well, and we can certainly say that they are much easier to adjust, in comparison to v brakes. To adjust the caliper, we just had to remove the screws, adjust the position of the brackets, and again make sure that the screws were tightened well after this. We were able to mount the brake levers on both sides of the handlebars, which was unusual but looked better. At 128g only, this is one of the lightest brakes in the market; however, this did not compromise with the braking power and performance.
We have included the link for the instructions manual of this disc brake and the brake pads below.
Tektro.com
Trpbrakes.com
No products found.
TEKTRO Aquila MD-M500
12. RUJOI: Distinctive Break Lock design; Tool-free adjustment and installation of components; Foldable Aluminum lever
- Application: Road cycling, Time trial, Triathlon
- Brake Type: Mechanical
- Pad Type: Universal
- Caliper Material: Aluminum Alloy
- Weight: N/A
- Rotor: Stainless Steel 160 mm 6 bolt
- Brake mount: Post Mount, Front + Rear
- Brake lever: Aluminum Finger Brake
- Complete package: This disc brake kit comes loaded with a whole brake system. There are 2 aluminum front and back calipers(51 mm), 2 aluminum bicycle brake handles, 2 stainless steel 160 mm Rotors, 2 sets of 6 bolts, & cable.
- Break Lock rotors: 160 mm rotor is used for both the front and rear wheel. At a thickness of 1.9 mm, the rotor body was constructed from SUS 5104 stainless steel. The innovative Break Lock design that was incorporated by the rotors allowed better dissipation of heat and offered enhanced braking power.
- Disc rotor adjuster: The gap between the caliper and the rotor can be adjusted using the adjuster for the disc rotor. It ensures that the braking pad and the rotor are parallel. The clearance between the pads and the rotor is also adjusted for smooth operation.
- Automatic lever position restoration: The aluminum levers will fold outwards so that if there is a crash, fast recovery is possible, with no breakage. These levers were designed for MTB use and could be used on mechanical disc & v-cantibrake. The blade has a 2 finger design while being “3-thumb” shift compatible.
- Brake pads: The brake disc set is compatible with a wide range of brake pads. However, the disc set is delivered with a pad that is using a metallic compound. If this original pad is to be changed, it is possible to do so without taking the caliper apart. The pads can be adjusted using a knob/wheel
- Cannot be used on flat-mount frames.
We installed the RUJOI Bike Disc Brake Kit very easily. For our MTB setup, the cable lengths for the front & rear wheel were just perfect too. Getting these aligned at the right tension took a few tries; however, we were able to “dial” them quickly. We replaced the stock brakes on the MTB for our test runs, and after a few sessions of fast downhill travel – we are yet to experience any shudder of the front fork. We also put in 10 miles offroad over 3 sessions, and we are yet to face any issue like something braking or coming off.
However, we would ask you to reconsider the rotor size for your purchase. The 160mm rotor is perfect for mountain biking and can be assembled easily too. The size of the brake rotor is a consideration that you have to look out for before making the purchase. This is a perfect set of rotors with diameters of 160mm, which means that they suit most mountain bikes. Additionally, there was no need for the caliper to be disassembled fully when we mounted the rotor. The rotors embodied a design that made it durable, which was also thanks to the stainless steel. We found the caliper in two colors, both of which could be used on any bike. During testing, power was adequate on the road. When we paired the brake with a louder cassette, we could hardly notice any rubbing noise from the brake. Test runs were made on downhills too. Braking felt very safe and consistent; however, we did notice a burning smell at the end of the test, which was coming from the pads maybe. If you are a mountain cyclist and need a pair of V-Brakes that can add to your safety as well as performance, then we would recommend this disc brake system from Rujoi.
RUJOI Bike Disc Brake Kit
Frequently Asked Questions
Q1. What are the benefits of using disc brakes?
Ans.: Because of its multiple functions and features offered by mechanical discs, the benefits of disc brakes are listed below.
- Power: The functional effectiveness of Disc brakes are the highlight of why disc brakes are significantly more powerful than cantilever or V brakes. Disc brakes have stronger endurance capability and last for a longer time span.
- Control: The superb braking system allows you to enjoy riding your bike with powerful braking performance without any type of compromise in its control.
- Reliance: With the knowledge and ability of the precise braking that this efficient system gives, you will be much more adequately prepared in handling any technical challenges if or when they arise. This combination of power, progression, and versatility that is equally fit to perform at its finest whilst tackling any weather condition is more than enough reason to give you a confidence boost while on the trail.
- Versatility: As the Disc brakes are designed to give exceptionally reliable performance even in varying weathers; this unique feature puts them on higher foreground compared to rim brake design which is susceptible to inconsistency and damage during their administration in wet conditions.
Q2. Are disc brakes better than v brakes?
Ans.: A constant and ongoing debate exists over the superiority in a comparison between V‑brakes or disc brakes. Due to an endemic in the easy access of disc brake-equipped bicycles everywhere; it has become somewhat of a significantly challenging task for anyone, especially a beginner, to pick out a bicycle. The advantages and disadvantages of Disc brakes have been noted in the table below:
| Advantages | Disadvantages |
|---|---|
| **Extreme weather like snow, rain hardly affect the performance of disc brakes. | **They are typically heavier. |
| Disc Brakes do not damage the rims of the tires. | **The fork would need to be compatible with disc brakes. |
| They are easy to install and configure | **The kick stand of the rear mount can be compromised by disc brakes. |
| Removing the tires off of bikes with disc brakes is relatively easier. | **The spokes are under more pressure in this configuration. |
| The conditions of the rims (wet, dry etc) does not affect the brakes and braking performance. | **Usually, they cost more. |
Unlike the disc braking system, the V‑brakes are designed to create friction and slow down by pinching the bicycle wheel’s rim between two brake blocks. The advantages and disadvantages of this brake type are highlighted using the table below:
| Advantages | Disadvantages |
|---|---|
| **V-Brakes are the budget friendly option. | **The rims are more prone to wear. |
| **Usually they can be maintained and replaced easily. | **Water, mud are said to compromise the braking performance. |
| **The hub, spokes are under no additional stress. | **The shoes for the brake will need regular replacement. |
| **The rear mount of the kick stand are not affected. | |
| **All components and replacement parts are readily available. |
In conclusion, it is clearly deducible that both these brake types have their own lists of pros and cons. of advantages and disadvantages. Even though there has been no clear distinction on the establishment of one system being better, it comes down to your priority, preference, and what you are willing to compromise. At the end of the day, it comes down to preference. Therefore, while making a purchase, when it comes down to picking out the braking mechanism of your bike; decide taking into consideration your own preference and priorities.
Q3. Mechanical disc brake vs Hydraulic disc brake – which is better?
Ans.: The disc brake system class comprises both mechanical & hydraulic disc brakes. Before analyzing them, it is important to know that modern disc brakes can offer enhanced performance even with minimal friction. However, their functionality and design between the two vary, as illustrated by the simple table below.
| Feature | Mechanical Disc Brake | Hydraulic Disc Brake |
|---|---|---|
| Mechanism of Brake | Cables | Fluid |
| Weight | Heavy | Light |
| Point of contact | Rotor | Rim |
| Brake performance | **It is usually less sensitive, and there needs to be more power at input | **More sensitive & efficient braking |
| Adjustment | Easy | Complex |
| Maintenance | Frequent | Requires no maintenance |
| Price | Budget-friendly | Budget-friendly |
The principal purpose of mechanical and hydraulic disc brakes are, in essence, identical. Each system strives to create a bike with mechanisms capable of offering substantial braking power which can allow riders the ability to maneuver their bikes even at varying speeds, through a wide array of terrains. The consideration of the better choice amongst these will depend entirely on the rider’s intent of the bicycle’s use. Hydraulic brakes are perfect for high-speed riding where the technical ability of the rider is challenged. They tend to be on the pricey end of the spectrum, so they can be a good option if you are willing to spend on a good investment. On the other hand, mechanical disc brakes can be great for everyday riding on commuter, mountain, or road bikes. Since they have a more economical price range, these are the perfect choice for any beginner level riders or anyone with a budget.
Conclusion
Mechanical disc brakes offer superior braking power consistently, irrespective of the weather. Modulation is better on disc brakes as well, allowing the rider to have more control over speed. There is also an element of mechanical advantage as well, which does not essentially require a huge amount of force at the lever. This is coupled with better heat dissipation so that there is no brake fade. Of course, the choice for best mechanical disc brakes is personal; however, we believe that the 12 best mechanical disc brakes that we have reviewed here will be able to deliver what you are looking for. Just check your brakes before you ride off. We hope to catch you soon again.