
Cycling while sitting in a proper riding position is not important to enjoy a smooth-riding performance but also to maintain optimum comfort. The riding position consists of three specific contact points. These contact points are the saddle, the handlebars, and the pedals. Out of these 3 main contact points, the saddle and the handlebars are the most essential.
These contact points must be positioned to suitable distances from one another so that the rider can enjoy a productive and comfortable ride. The suitable distances that are mentioned are not universal and must be determined according to the rider’s dimensions. To be more specific, the dimensions are the length of the torso and the leg. Also, the appropriate measurements are based on the rider’s preferred riding position. This can be anything from a relaxed riding position to a more assertive racing position.
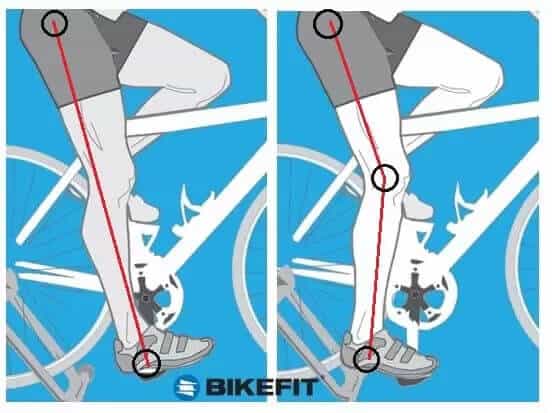
The different types of riding positions according to various riding styles can be seen in the diagram given above. So as you can see, the faster you ride, for example, while road racing or for time trials, the more leaned or hunched over your position will be. However, if you are going for a cruise or a more relaxed type of road riding, you will most likely be pedaling in an upright riding position.
The saddle height is set differently for different types of bikes. For road bikes, the primary focus is on aerodynamics, pedaling efficiency, power, and whether the height is adjusted for your knees. On the other hand for mountain bikes, it depends on bike handling and maneuverability. Another important factor for saddle height of mountain bikes is the type of mountain terrain you will be riding on. So for that, the rule of thumb is that the saddle should be positioned lower, the more technical the trail is. And that it should be placed higher if the terrain is smoother. Therefore, if you are riding on smooth and flat mountain trails, then the saddle height of a mountain bike and a regular road bike should be the same.
Now if you go for other types of mountain biking such as enduro or singletrack, then the saddle height should be a few inches lower or an inch higher than that of a road bike. However, for gravity-assisted mountain biking such as downhill riding or dirt jumping, the saddle is placed at the bottom and is not really that important.
Handlebar reach, i.e. distance from the seat to the handlebars, depends on the rider’s torso and arm’s length. The distance should be such that hands are comfortably holding the bars, with a slight bend at the elbows. Without too much stretching, cramping at the back or the shoulders, etc.
A lot of riders go for a lower positioned handlebar height as it helps them to improve traction. This is because it lowers their center of gravity. This is also preferred by mountain bike riders as it also improves overall control which helps a lot when climbing. However, you should not place the handlebars too low as it can hamper your control of the bike while riding. Road bike riders usually like to drop their handlebars significantly. The handlebars for road bikes are usually placed beneath the saddle. This height provides the rider to pedal in an aerodynamic position. Commuters and recreational riders prefer a more comfortable position and so their bikes have handlebars that are at the same height as the saddle or slightly above it.
I. Handlebars
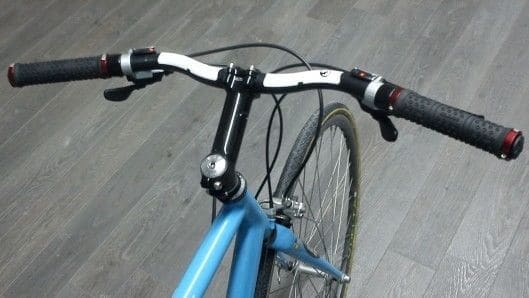
Image Source: trendhunter.com
Types of Handlebars
There are a variety of handlebars for you to choose from. First of all, flat handlebars are the regular ones that you will notice on the majority of the bikes. Although they are called flat bars, it comes with a little bend. They are known for being versatile and that is why cross-country riders love these handlebars. Next, we have the riser bars. These are a lot like flat bars, except that fact that they are wider and they sort of rise along the clamp’s center. Riser handlebars are mostly used for trail biking as it will enable you to ride while sitting in an upright position. Bullhorn handlebars are the ones that curve forward and upward.
This is the best choice for climbing activities and looks absolutely fantastic. Then we have the drop bars which are also highly popular as it not only looks great but also an all-rounder. The regular drop bars come with a completely level middle section quite like the ones you see on flat bars. It is a great option for bike enthusiasts. We must mention, aero bars which are also referred to as triathlon bars. These are mostly preferred for time trial racing. Aero bars consist of two broad bars that are quite close together. It also has armrest pads where you can place your forearms.
Aero bars enable you to sit in a narrow forward position which therefore reduces air resistance while riding. Next up we have the cruiser bars. Cruiser handlebars are also called Upright or North Road handlebars. It comes with maximum sweep and enables the rider to pedal while sitting in an upright position. Last but not least we have the butterfly bars otherwise referred to as trekking or touring bars.
These handlebars are built for long rides and accommodate different hand positions. It also comes with a huge shelf space so that you can store your necessary objects such as a phone or bag when you go for a long ride.
The handlebars mentioned above are the most common and well-known types used by riders. There are also some other options such as BMX handlebars which are made to withstand the intense challenges of BMX riding. There are also mustache bars, recumbent bars, and many more.
1. Height & Reach

Image Source: bike.bikegremlin.com
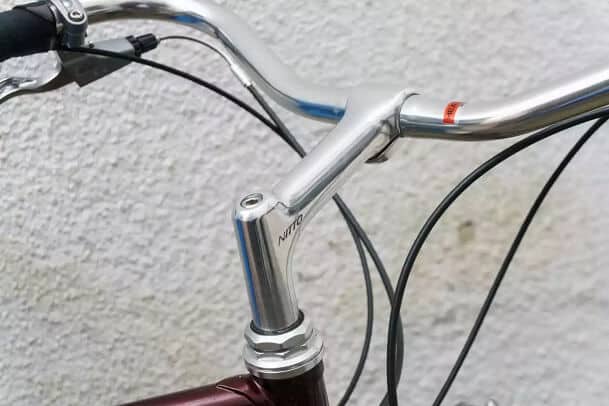
The reach of the handlebar is the distance between the saddle and the bars. This must be set according to the length of the arm and torso. The optimum reach should ensure that your hands can grab the bars properly and the hand position is accompanied by a little bend around your elbows. This hand position will allow you to ride comfortably.
Another important instruction is that the handlebars should be as wide as the rider’s shoulders. If this is taken care of, everything else can be chosen according to the rider’s preference. Some riders prefer aero bars while others like to ride sitting upright. Therefore, after ensuring that you can reach the handlebars comfortably, without having to stretch or bending your elbow too much or too little, you can set everything else according to your needs.
Now let’s talk about height. The handlebars of your bike must be at the same height as your saddle. You can even put it above your saddle if you want to sit upright. If you place your handlebars below the level of your saddle, it will apply more pressure on your neck, wrists, arms, and also your back.
Now you may be asking how does one actually go about adjusting their handlebars. Well, we have all the answers you need.
2. Add or Remove Headset Spacers
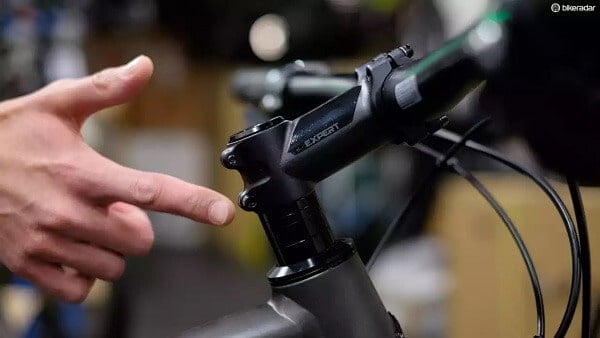
Image Source: bikeradar.com
First, you should try removing your headset spacers. Headset spacers are there to aid in preloading the bike’s headset bearings while adjustments are being made. They are located on the steerer tube of the fork. Usually, bikes come with 20 to 30 mm headset spacers which can be shifted easily, both above or even below the stem.
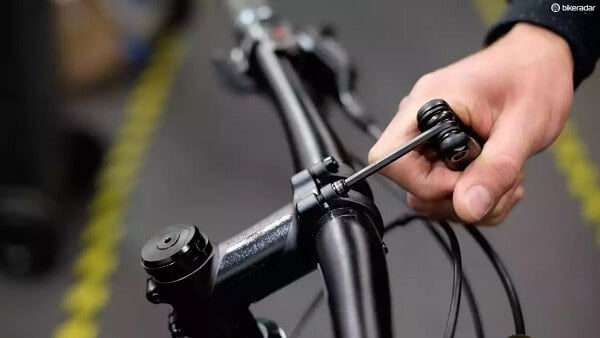
Firstly, unfasten the clamp bolts which are on the backside of the stem. Then, take off the top cap from the stem and simply remove the stem from the steerer tube. Now, you can choose how high or low you want to place your handlebars. After making your decision, you will need to either add or remove the relevant spacers. When you are done with that you will need to put it all back together. Place the stem again upon the steerer tube and return the head spacers that you unfastened on top of the stem.
You need to make sure that there is a sufficient gap of about 3 – 5 mm between the spacers on top of the stem and the steerer tube. Now, put the top cap and bolt back as tightly as you can. Then, line up the stem along with your front wheel. This is to ensure that the wheel and handlebar are at the correct angle. After that, with the help of a torque wrench, you must uniformly torque the clamp bolts of the stem according to the value given by the manufacturer. This value will most likely lie somewhere between 5 – 8 Nm. Lastly, after completing all that you must examine the headset adjustment.
3. Flip The Stem On Your Bike
If adjusting your headset spacers does not get the job done, you can try flipping your bike’s stem. How can you do this? You can do this by unfastening the bolts which connect the bar to the stem. Then, remove the faceplate of the stem and set it aside. You must note or remember the brake lever and handlebar angle, as you will need them again later on. Let the handlebar hang to the side and then take off the stem from the steerer tube as explained before. Then, simply flip the stem and place it back on the steerer tube. Lastly, put everything back just as it was before.
4. Adjust The Height Of The Quill Stem
If your bike has a quill stem you can adjust its height to set your handlebars properly. Firstly, loosen the bolt located at the top of the stem. Now you should be able to adjust the stem, however, if that is not the case, then simply strike the bolt using a hammer. After that, adjust the height of the quill stem. Set the stem back as it was before.
Mountain Bike Handlebars
If you want to feel comfortable while riding your mountain bike, you need the proper handlebar height. This will allow your elbows, neck, back, and shoulders to be relaxed and enable you to ride with complete confidence. Also, riding with the perfect posture provides improved cushioning on rough mountain biking terrain. Typically, mountain bike handlebars are positioned a bit lower than the saddle. However, recreational MTB riders prefer higher placed handlebars to enjoy a more comfortable ride.
If you find that you do not have the proper height for your MTB handlebar, you should modify it. You can do this by following the steps given below:
- If there is no thread on the power, then you should begin by removing the screw along with the top cover.
- After that, you have to take off the screws on the side and the power.
- Some handlebar models consist of powers that come with lifting rings. These lifting rings can be moved upward or downward to change the power’s height.
II. Bike Seat
There are a lot of options available when it comes to bike seats. Let’s take a quick look at them to get a better idea.
1. Racing Saddle:
This saddle allows you to move freely and reduce chafing. Racing saddles are stiff, light, and slim. These types of saddles are also available without a cut-out section, and also sometimes without a nose. This helps to relieve pressure from sensitive areas while riding.
2. Comfort Saddle:
Comfort saddles come with wide shapes and consist of a good amount of padding. These saddles are made for you to ride comfortably on long rides. The padding enables the seat to absorb shocks which reduces vibration from bumpy and rocky roads. These saddles are preferred by women due to their brief nose, relief channel, and wide shape.
3. Mountain Bike Saddle:
Mountain bike saddles are quite narrow in terms of their shape. It comes with moderate padding to reduce the effects of all the bumps and jolts from the road. This seat’s rear is made in such a way that you can move to the back with ease. The saddle’s nose consists of a downward slope so that you can move forward smoothly.
4. Gel Saddle:
Gel saddles are popular among short distance and weekend riders. The gel padding spreads your weight uniformly over the saddle. It also allows you to sit in an upright position while riding. It contours the saddle according to your body and also absorbs shocks. Although it is quite heavy, it can come in both heavy as well as light versions. They are quite wide in shape for you to sit comfortably.
5. Suspension Saddle:
Suspension saddles are both narrow and light in weight. The suspension system is located underneath the bike’s seat. It is put there to suspend the seat. This keeps the rider protected from uneven and rough terrain. These saddles are mostly available in mountain and hybrid bikes.
6. Leather Saddle:
These saddles are made completely from leather. They look amazing and are quite expensive. Although they seem hard at the beginning, they will become the most comfortable saddle after they are broken in. The main drawback is that you cannot let them get wet. Leather saddles are wide at the rear and are capable of absorbing heat. They are highly durable and will last you for a long time as long as you take proper care of them.
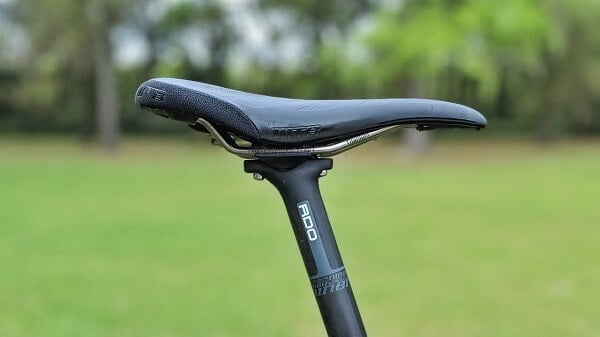
7. Saddle Height:
To get the most accurate saddle height, you should determine your bike’s current saddle height. How to do that? First, measure the length of your saddle. Then, locate the midpoint from that measured length and mark it. After doing so, measure the length from the center-top of the seat, straight to the bottom bracket’s center. Then you will get your current saddle height.
Next, you should determine the saddle’s position. You can do this by placing the bicycle against a wall. Then, measure the length from the bike’s bottom bracket to the wall. After that, derive the length from the saddle’s tip to the wall. Lastly, find the saddle setback by subtracting the first measurement from the second one.
After that, you must find the saddle tilt. As a lot of seats have contours, finding the saddle tilt is the best way to get the optimum measurements. First of all, put a small board on the seat. Then, use an inclinometer to measure the tilt.
Now, how does one go about setting the required saddle height?
There are many methods that you can follow. We suggest you go with the heel method as it is the quickest one. This method can be carried out in a doorway. It will yield even better results by placing your bike on a trainer. Put your bicycle shoes on and sit on your bike. Then put your heels on the pedals. Then start pedaling slowly. Now, if the seat is set too high, you will not be able to pedal properly. If that is the case, get it down about 1 – 2 cm each time until you can pedal seamlessly. Do the same thing if you feel your seat is too low. Start going up by 1 to 2 cm until you feel like you have to slightly reach for the pedals.
Frequently Asked Questions
Q1. What height should my bike’s handlebars be & why?
Ans.: The handlebars of your bike must be at the minimum as high as your bike’s saddle. You can also set the height above the saddle to ride it in an upright position. Riding with your handlebars located lower than the saddle will put a lot of extra pressure on your elbow, wrist, back, and arms. But don’t put them too high either, as that will make your ride uncomfortable and make you rock from one side to another while you ride.
Q2. How would I be able to find an ideal height for my bike’s handlebars?
Ans.: Finding the ideal handlebar height is not as straightforward as finding the ideal bike’s seat height. It depends on what kind of riding you do, your body, and what position you like to ride in. Therefore, we suggest actually going out there and trying your bike out. See what kind of riding you like and in what position you are actually riding in.
Q3. Should my bike’s saddle height be higher than that of the handlebars?
Ans.: The standard rule is that the top of the handlebar should be either as high or in some cases even higher than the saddle. This is the standard unless you are someone who wants to ride super fast. You can try this method to check. Place your elbow on the saddle’s nose and try reaching the handlebar by hand. It is a bike that fits you, the distance from the handlebar’s stem clamp to your fingertips will be about two and four fingers’ wide.
Q4. How am I supposed to know if my bike’s saddle happens to be too high?
Ans.: If your saddle is positioned too high, you will feel unsteady while riding and might also feel pain in your knee. Your ride will not feel smooth and pedaling will not seem efficient. Also, in the case that your seat is too low, you will feel discomfort on the front part of your knees.
Q5. What are the tricks & tips for making my bike’s seat comfier?
Ans.: You can make your bike’s seat more comfortable in the following ways:
- Set the correct reach for your bike.
- Set the correct handlebar height.
- Pick the right saddle that makes you feel comfortable.
- Determine the accurate saddle height.
- Make sure you have the right saddle angle.
- Make sure you occupy the whole seat when you ride your bike.
- Don’t use a wide seat as they can cause chafing.
- Choose a saddle with thin padding as thicker padding can put more pressure on your sit bones.
➥ Read more: 11 Ways to Make Your Exercise Bike Seats More Comfortable
Q6. What are the signs that my bike’s handlebars are a bit too low?
Ans.: Many signs will show you that your bike’s handlebars are a bit too low. However, the major signs that your handlebars are too low is that you will have numb hands and your lower back will feel sore after you go out for a ride. If you are getting these signs, then you should raise your handlebar height.
Conclusion
The correct height for your bike seat and handlebars are essential for you to enjoy your ride. Therefore, we hope you learned a lot from our article and you can now apply them to your bike to improve your overall riding experience. We hope we could add value to your cycling life and that you will reach your riding goals. Have fun and ride safely!